Ontario grain Christmas crafts
The holidays are a great chance to get creative and decorate your house, and grains can help. Keep an eye out on your local TV station to see Laura Ferrier from Grain Farmers of Ontario demonstrate how to make salt dough ornaments and corn husk angels.
Home-made decorations on CHCH Morning Live
CHCH Morning Live (December 16, 2015): Laura has been sharing these recipes for home-made holiday decorations on TV stations across the province all month. Check her out on CHCH Morning Live here.
 Salt dough ornaments
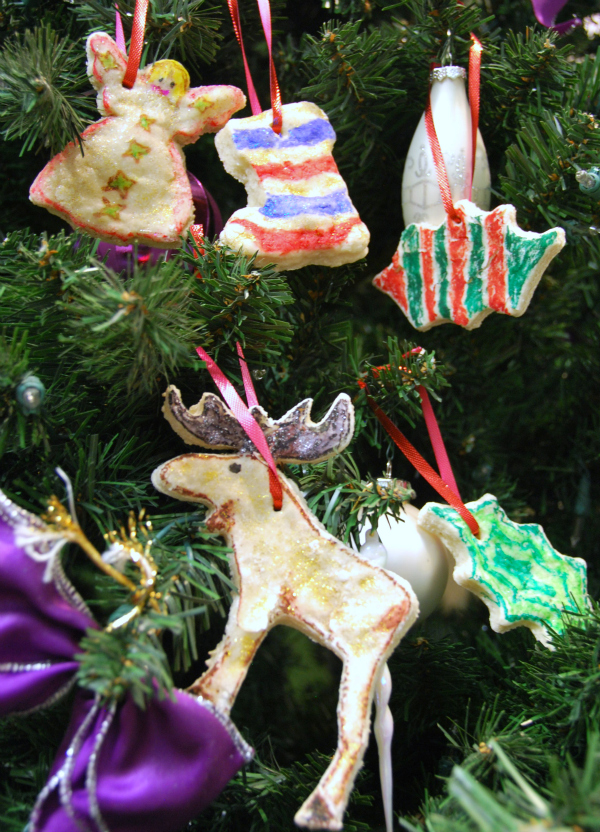
Salt dough ornaments are a great craft for kids. They are simple to make and lots of fun to cut out and paint. Make sure children don’t try to eat the dough–even though they look like cookies, they don’t taste good! This recipe makes about 15 ornaments.
Materials:
- 4 cups flour
- 1 cup salt
- 1 1/2 cups warm water
- Straw or toothpick
- Rolling pin
- Cookie cutters
- Baking sheet
- Paint or glitter to decorate; varnish
- String or ribbon
Directions:
- Combine flour and salt well. Gradually add water, stirring with a large spoon. Finish mixing with hands. Knead until soft and pliable. Add more water if needed.
- Roll out on floured surface about 1/8 inch thick.
- Cut shapes with cookie cutters. Place on cookie sheets.
- Make a hole in the top of the ornament with toothpick or straw for threading string.
- Bake at 325 degrees F (165 degrees C) until hard, about 45 minutes.
- Decorate with paint, glitter, or whatever you like. Once dry, varnish to preserve.
 Corn husk angels
These unique angels can really add a natural feel to your holiday decorations. They can be spray-painted with gold glitter to dress them up a little bit.
Materials:
- Large bowl
- 3-6 corn husks per angel
- Newspaper, dish towel, or paper towel to drain
Directions:
- Fill the bowl with warm water. Soak the husks for 10 minutes until soft.
- Separate the husks into individual leaves, taking care not to tear them.
- Find two pieces of husk that are of similar size. You can tear them to make them more narrow if you like.
- Cross the pointy end of the husks and point them up. Tie about 2 inches below with a thin strip of husk.
- Flip the top part above where you just tied the knot downwards, so it folds over itself. This becomes the head. Tie the angel around the neck with another thin strip to secure the head.
- Find two more pieces of husk that are of similar size. One at a time and placing the pointy end up, tie the husk around the angel`s neck. The pointy end should point upwards and the wider part down towards the skirt (the remainder from the head).
- Let the angel dry. If you like, use glitter paint on them once dry.